Taking Control: Technical Guide to Replacing a Dhiraagu Router
This is the technical companion to my blog post — Taking Control: Completely Removing My Dhiraagu Router. If you want the backstory, start there.
Prerequisites
Before you begin, make sure you have the following:
| Item | Purpose |
|---|---|
| GPON SFP ONT module | Replaces the ONT functionality of your Dhiraagu router |
| Media converter or SFP-compatible device | To plug the SFP module into (router, firewall, or switch with an SFP slot) |
| A device running a router OS | I used OPNsense, but pfSense or any router with PPPoE support works |
| Your Dhiraagu PPPoE credentials | Username and password — found in your current Dhiraagu router |
| Access to your current Dhiraagu router | To extract authentication details before swapping hardware |
Make sure that the SFP module supports the PON network your router is using. Most Dhiraagu packages I’m aware of use GPON, but this may have changed since writing.
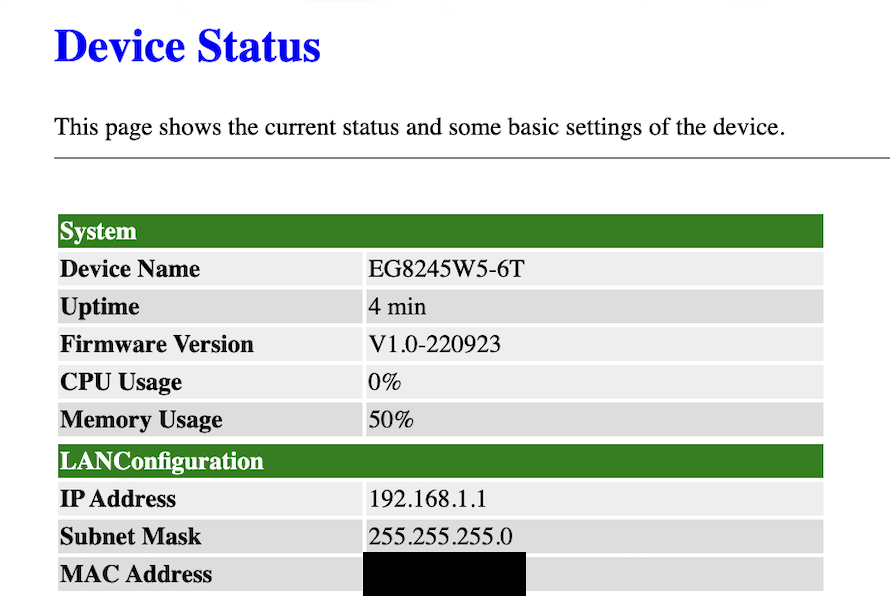
You can verify this by logging into the router admin page and navigating to System Information > Device — it’s listed under Description: EchoLife EG8245W5-6T GPON Terminal ...
Here are the exact items I got from AliExpress.


Step 1: Extract Details from Your Dhiraagu Router
Before disconnecting anything, log into your Dhiraagu router and note down the following:
- PLOAM password — used for PON authentication
- PPPoE username and password — needed for WAN authentication
- GPON serial number — the OLT uses this to identify your ONT
- MAC address — may be needed depending on how your OLT authenticates
- Product Class — model of the router
Router Logins
There are two logins to the router — a default admin and a super-admin with access to more settings. On my router (Huawei EG8245W5), these are Epuser and Epadmin respectively. The super-user account has been root, telecomadmin for previous models. Default passwords can be found here and here
Finding the Serial Number, Model, and MAC Address
Log in with the Epadmin account and navigate to Settings > System Information > Device. From this page you can find:
- Serial Number — listed as SN (e.g.
48575443XXXXXXXX (HWTCXXXXXXXX)) - Product Class — listed as Device Type
- MAC Address — also printed on the underside of the router
Extracting PPPoE Credentials
The super-admin account can download the router’s configuration file from Settings > Maintenance Diagnostics > Configuration File Management. In the XML, look for the WANPPPConnectionInstance tree — it contains the PPPoE username and password.
The password is encrypted, but can be decrypted using this Huawei utility.
Alternatively, you can try asking Dhiraagu via live chat for your PPPoE credentials. They’ve provided these in the past, though YMMV. In my experience with Ooredoo, they do not provide this, or any access to the super-admin account.
Extracting PLOAM Credentials
The PPPoE password is also used as the PLOAM/PON password for authentication.
These details are what the OLT uses to verify your ONT is legitimate. Without them, your SFP module won’t be able to authenticate.
Step 2: Configure the SFP ONT Module
The SFP module has its own web management interface. To access it:
- Plug the SFP module into the media converter
- Connect your computer directly to the media converter via Ethernet
- The SFP module’s default IP is
192.168.1.1— assign your computer a static IP in the same subnet (e.g.192.168.1.2) so the two can communicate - Open the web UI in your browser
Optional: Change the SFP Module’s LAN IP
By default the module sits on 192.168.1.1, which likely isn’t on your home network’s subnet — or if it is, the address probably isn’t free. I changed mine to an IP in my home range (192.168.100.0/24) so I could access the web UI through my regular network instead of needing a direct connection every time.
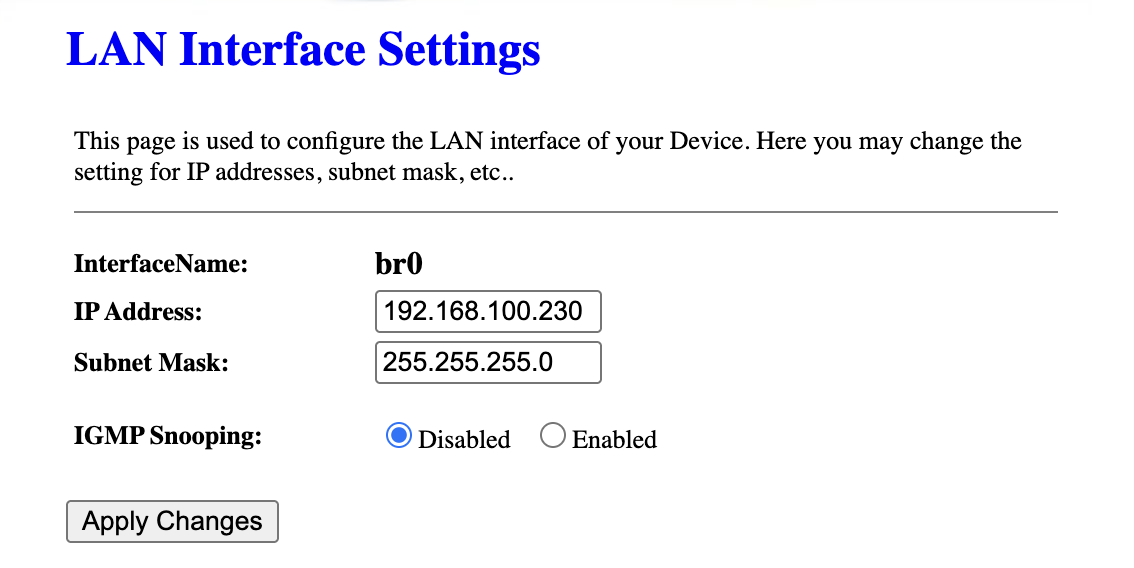
Warning: Be careful when changing LAN settings — you will lose access to the SFP module if you misconfigure this.
Configure Authentication
Navigate to the Settings page and fill in the following fields using the values you extracted in Step 1:
- PLOAM Format
- PLOAM Password
- SN (Serial Number) — match this to your original Dhiraagu ONT
- Vendor ID
- Product Class
- MAC Address
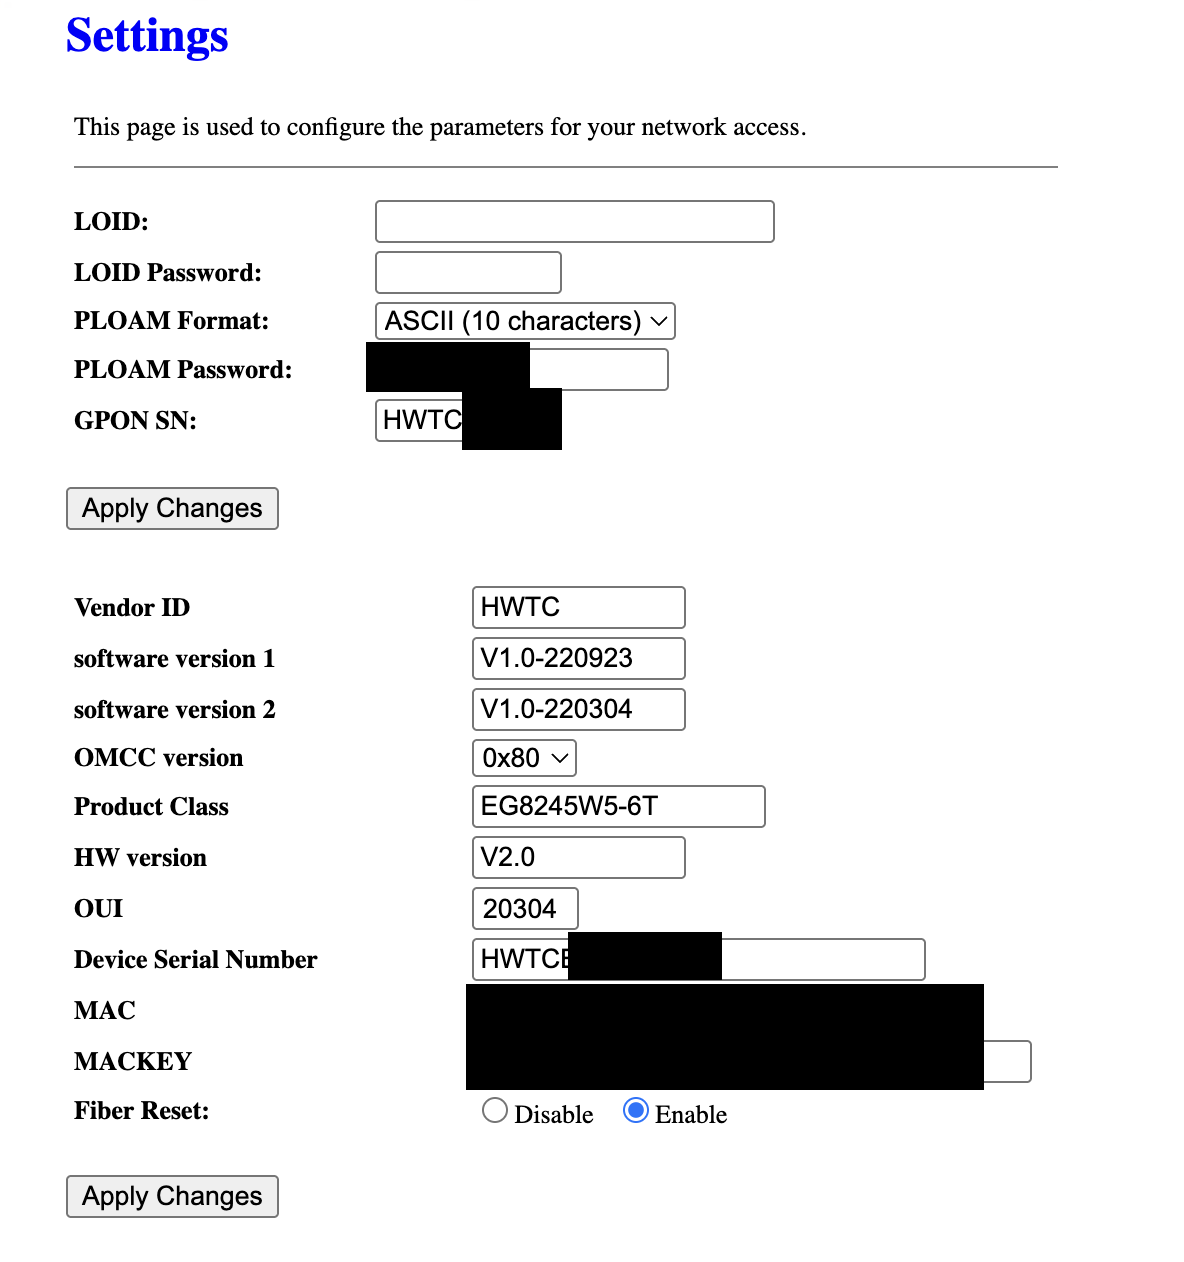
The fields actually required for authentication vary by ISP. For Dhiraagu, I found that you don’t need to modify software version, OMCC version, HW version, OUI or MACKEY.
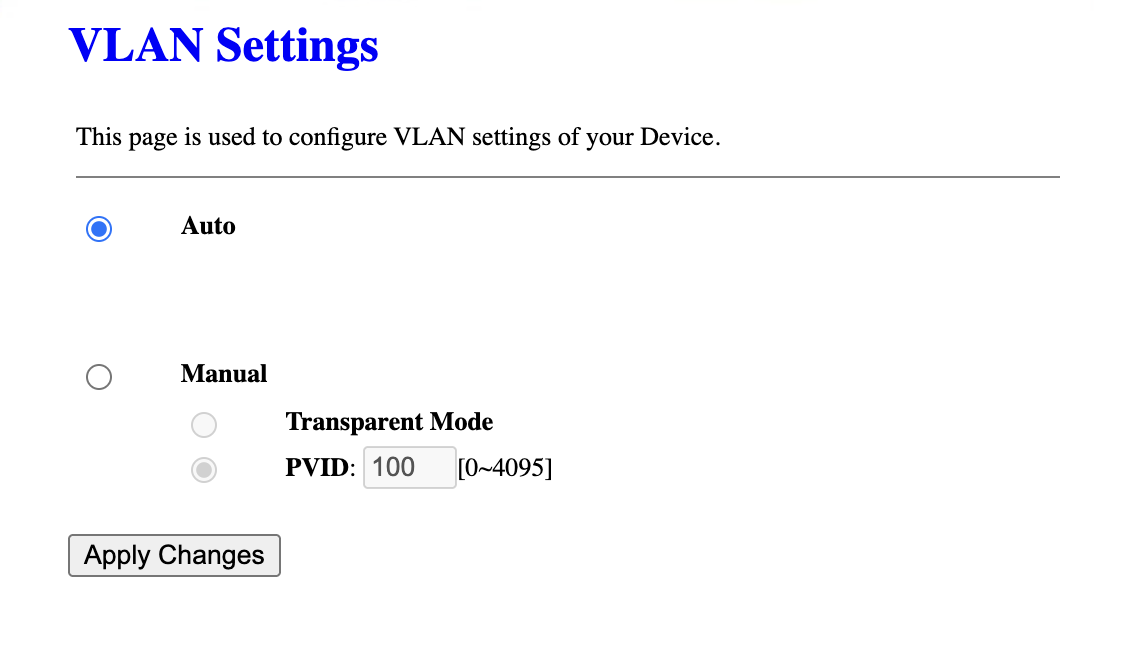
Leave the VLAN settings at their defaults — no VLAN is needed for PON authentication.
Step 3: Authenticate with the OLT
OLT Registration States
| State | Meaning |
|---|---|
| O1 | Initial state — no signal |
| O2 | Standby — signal detected but not registered |
| O3 | Serial number state — OLT is checking your SN |
| O4 | Ranging state — OLT is measuring distance |
| O5 | Operational — fully authenticated and connected |
Once the SFP module is configured:
- Plug the fiber cable into the SFP module
- Check the module’s status page for the O5 state — this means successful authentication with the OLT
- If you’re not reaching O5, double-check your serial number and credentials
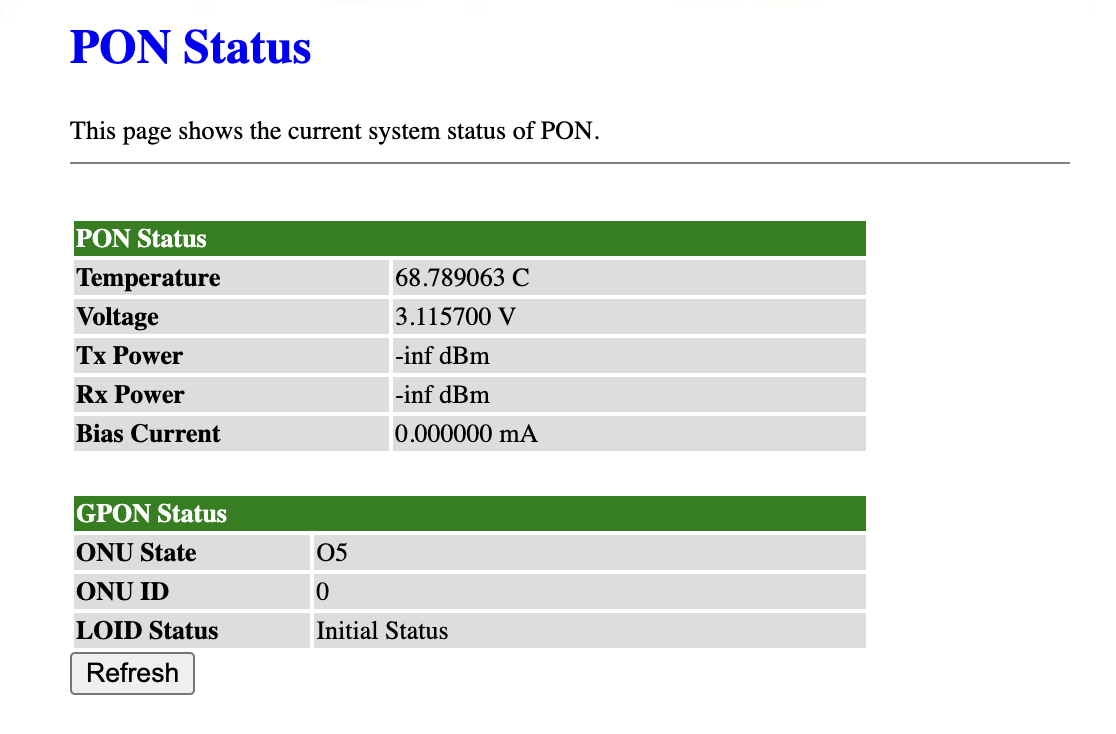
I have found that even though the LOID status doesn’t change, the ONT successfully authenticates
Step 4: Set Up PPPoE on Your Router
With the SFP module authenticated at Layer 1/Layer 2, you now need a device to handle Layer 3 (routing) and WAN authentication via PPPoE.
This step depends on your router — whether it’s Asus, MikroTik, pfSense, or OpenWRT. Connect the media converter to your router’s WAN port, or plug the SFP module directly into an SFP slot if your router has one.
I used OPNsense installed on a spare computer, so the steps below are for that:
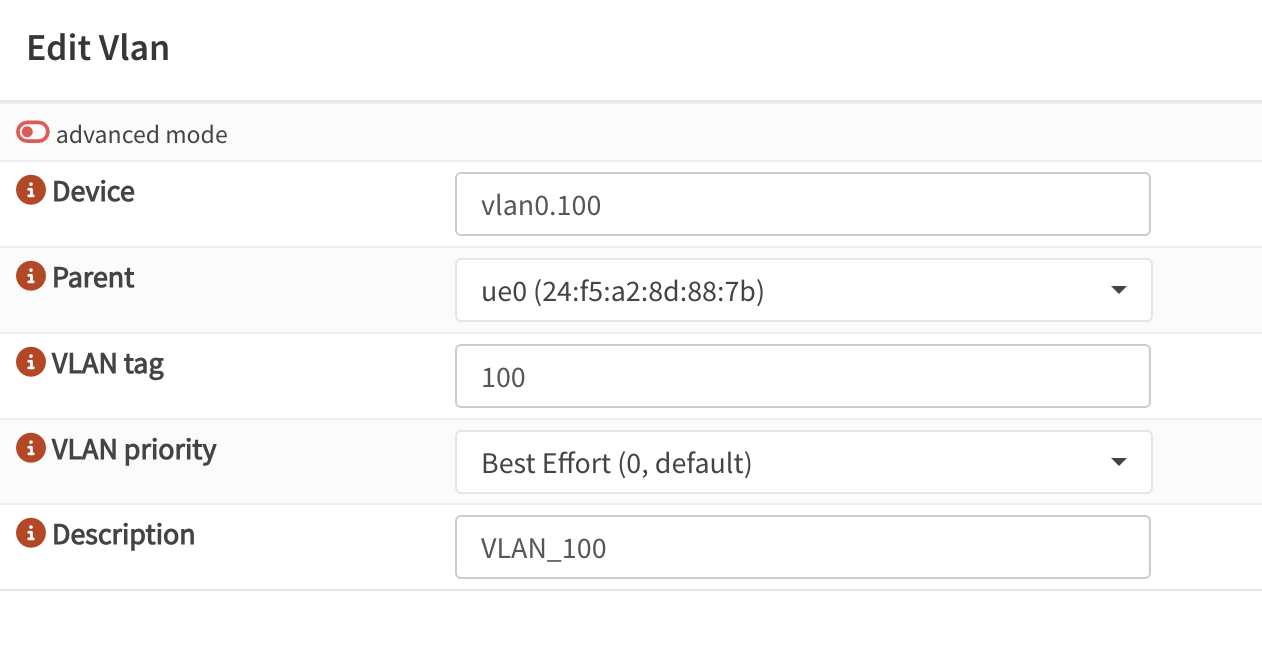
1. Create a VLAN Interface
- Go to Interfaces → Devices → VLAN → Add
- Select the physical port connected to the GPON SFP
- Enter the ISP’s VLAN ID - Dhiraagu uses VLAN 100 for internet.
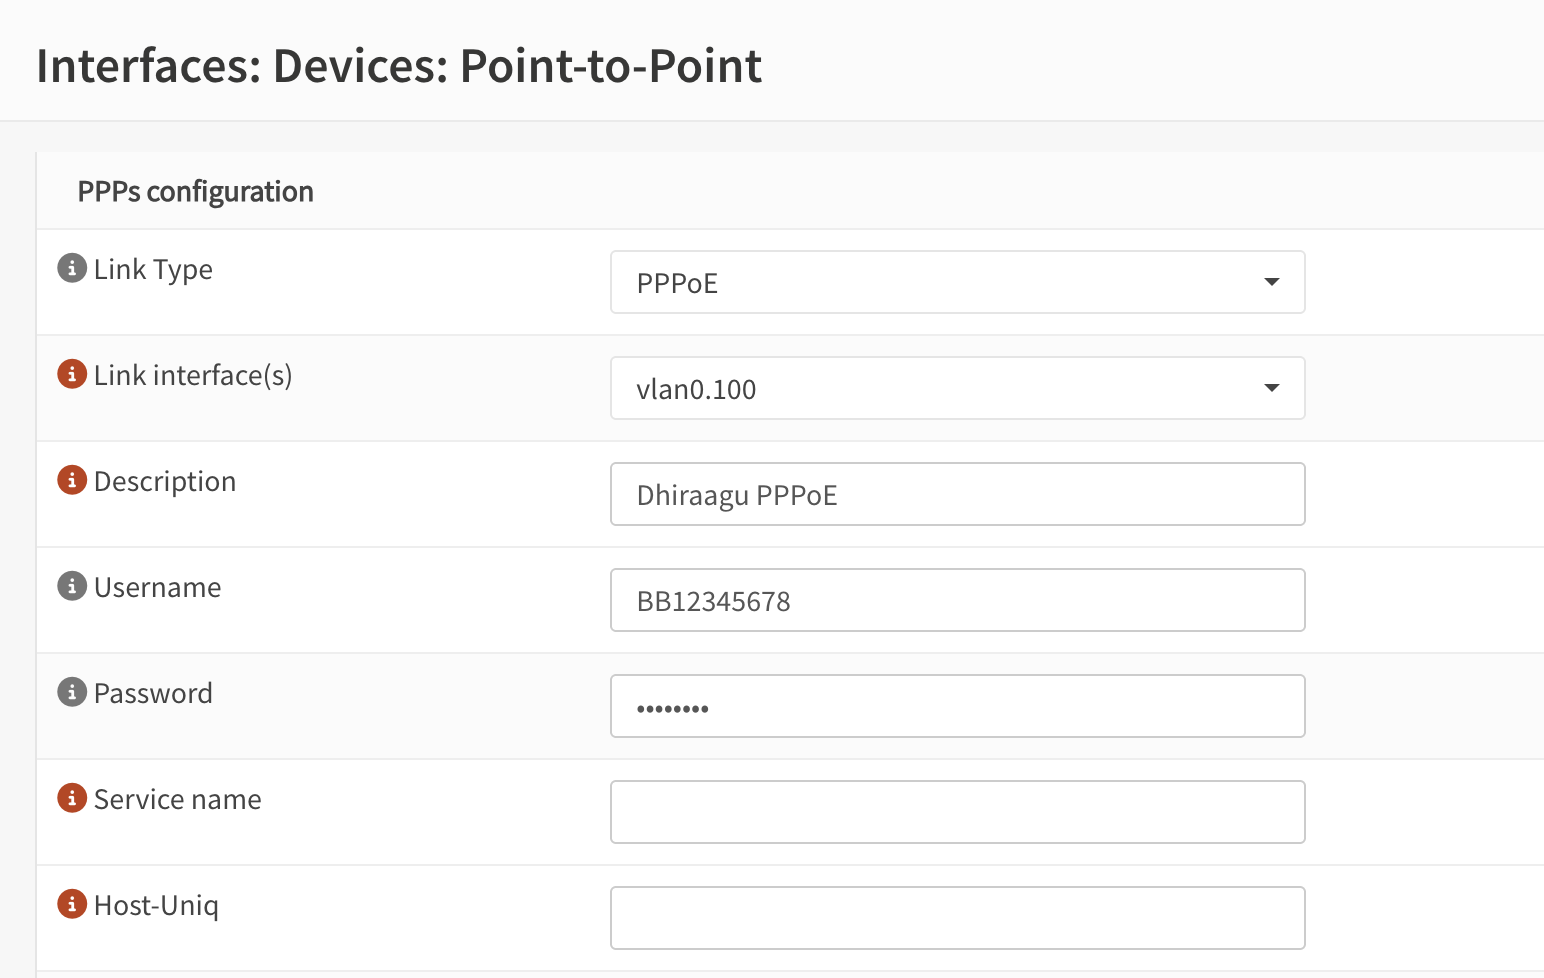
2. Set Up PPPoE
- Go to Interfaces → Devices → Point-to-Point → Add
- Link interface(s): the VLAN you just created
- Enter your PPPoE username and password
3. Assign PPPoE to WAN
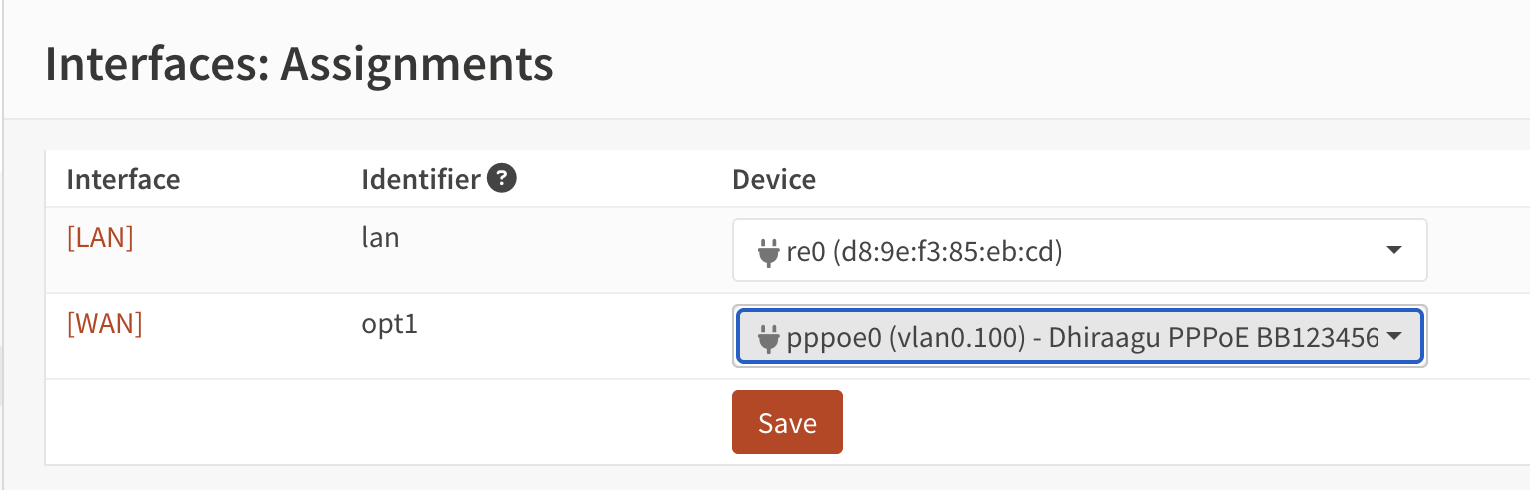
- Go to Interfaces → Assignments
- Assign the PPPoE interface as WAN
4. Verify Connectivity
Once PPPoE is established:
- Confirm you have a public IP address on the WAN interface
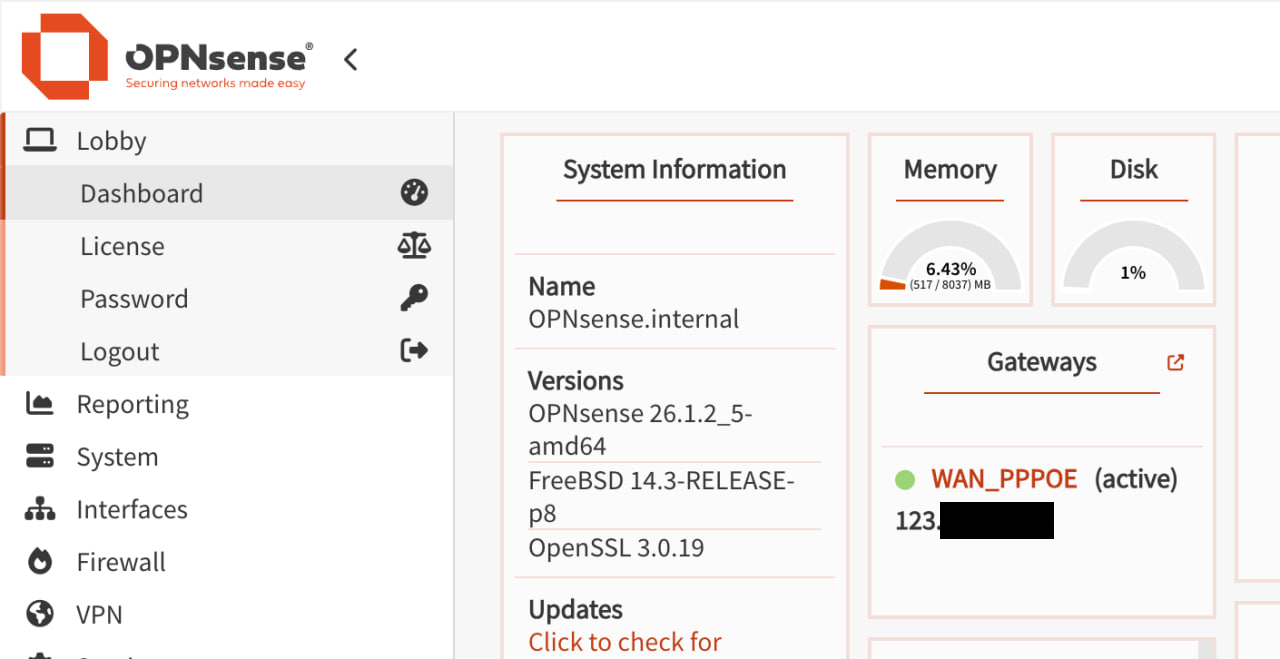
Congratulations — you’ve successfully replaced your ISP’s hardware entirely. Your fiber connection now runs through your own SFP ONT module, authenticated with the OLT, with routing handled by your own device over PPPoE.
Known Issues
Heat
The SFP ONT module gets extremely hot during operation — too hot to handle with bare hands. From my research, this appears to be normal for these modules. Mine runs around 60–65°C. They are rated up to 85°C, but I would find some way to actively cool this for extended usage.
Disclaimer
Misconfiguring a GPON module can cause interference with other subscribers sharing the same OLT. If your ONT transmits during another ONT’s allocated time slot, it will cause upstream collisions affecting everyone on that fiber. Proceed at your own risk and only if you understand what you’re doing.
That said, this was purely an academic exercise conducted in a controlled lab environment for educational purposes only. The Dhiraagu router is safely plugged in, exactly where it belongs, faithfully serving my home network as intended. I would never dream of replacing ISP-provided equipment. That would be wrong. I love my ISP-provided hardware.